How to Make Marigold Oil Blog Post
Marigold Oil: Crafting a Natural Healing Oil at Home
Hello, everyone! Today, I’m diving into how to make "Marigold Oil" at home using the wonderful marigold we talked about last time. This natural oil is fantastic for skin healing, moisturizing, and soothing inflammation—perfect for wounds or dry skin. It’s simple, fun, and totally doable at home. I’ll walk you through the overview, ingredients, step-by-step process, precautions, and usage in blog style. Let’s get started!
Overview: What is Marigold Oil?
Marigold Oil is a natural oil made by infusing marigold (Calendula officinalis) petals into a carrier oil to extract its beneficial compounds. Used for skin regeneration, anti-inflammatory, and antibacterial effects, it’s a base for creams and salves too. Traditionally applied for wound care, burn relief, and skin soothing, it’s now a DIY skincare favorite. Making it at home ensures a pure, additive-free product that’s both safe and cost-effective. Ready to learn how?
Ingredients: Your Checklist
You’ll need just a few simple items—many you might already have!
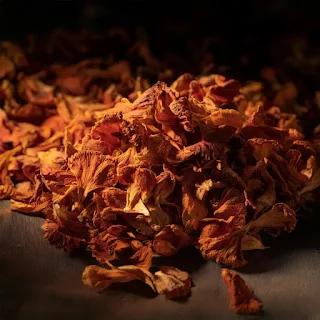
- Dried Marigold Petals: 1 cup (20-30g)
- Fresh works but dries better to avoid mold; organic is safest.
- Carrier Oil: 1-1.5 cups (200-300ml)
- Olive oil (antioxidant-rich), jojoba oil (great absorption), or sweet almond oil (super moisturizing)—your pick!
- Glass Jar: Clean, dry, sealable (250-300ml recommended)
- Ensure a tight lid to limit air exposure.
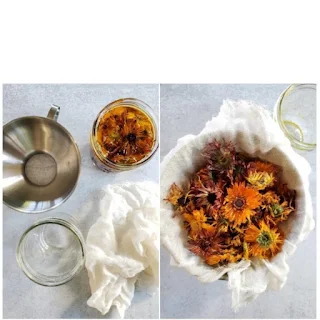
- Straining Tools: Cheesecloth, sieve, funnel
- For filtering out petals.
- Optional: A few drops of Vitamin E oil
- Extends shelf life and adds skin benefits.
How to Make It: Step-by-Step Guide
There are two methods: "Slow Infusion (Cold Method)" and "Fast Infusion (Heat Method)." Pick what suits your time!
1. Slow Infusion (Cold Method) - Takes 4-6 Weeks
- Pros: No heat preserves nutrients for a purer oil.
- Steps:
- Sterilize your jar with hot water and dry thoroughly.
- Add 1 cup of dried marigold petals, then pour 1-1.5 cups of carrier oil until petals are submerged.
- Seal the jar, shake gently, and store in a cool, dark place for 4-6 weeks. (Shake daily for best results!)
- Once the oil turns yellow, strain petals using cheesecloth and a sieve into a clean jar.
- (Optional) Add a few drops of Vitamin E for longevity.
2. Fast Infusion (Heat Method) - Ready in a Day
- Pros: Quick for when you’re short on time.
- Steps:
- Set up a double boiler with water in a pot and a stainless steel or glass bowl on top.
- Combine 1 cup of dried petals and 1-1.5 cups of oil in the bowl, heating gently for 1-2 hours at 40-50°C. (Avoid high heat to protect nutrients!)
- When the oil turns yellow, cool it, then strain petals with cheesecloth into a jar.
- (Optional) Add Vitamin E drops.
Tip: Slow yields deeper flavor and potency, but fast is great in a pinch!
Precautions: Make and Use Safely
A few things to watch out for:
- Petal Condition: Fresh petals must be fully dried—moisture can spoil the oil.
- Temperature: For the heat method, keep it below 50°C to avoid losing potency.
- Storage: Store in a cool, dark place away from sunlight. Refrigerate for 6 months to a year of use.
- Allergy Test: First-time users, apply a small amount to your inner wrist and wait 24 hours.
Usage Tips: How to Use Marigold Oil
Here’s how to enjoy your creation:
- Skin Massage: Rub 2-3 drops onto wounds, dry spots, or inflamed areas.
- Hair Oil: Massage into your scalp for moisture and health.
- DIY Cream: Mix with beeswax for a healing balm.
- Bath Boost: Add a few drops to your bath for skin-soothing bliss.
Wrap-Up: Healing with Marigold Oil
We’ve covered how to make and use marigold oil from start to finish. This homemade gem is a natural treat for your skin. I tried the slow method recently and used it at night—my dry hands feel so soft now! Give it a go to experience wound healing, hydration, and calm. Crafting your own oil is a rewarding way to embrace health and relaxation. I’ll be back with more fun ideas—have a happy day!


.jpg)
.jpg)
.jpg)
.jpg)
.jpg)
.jpg)
.jpg)
0 Comments